However, with great power comes great responsibility. Telescope, by default, is accessible in local development environments. This can be a security risk in production environments where unauthorized access could expose sensitive application data.
Part 1
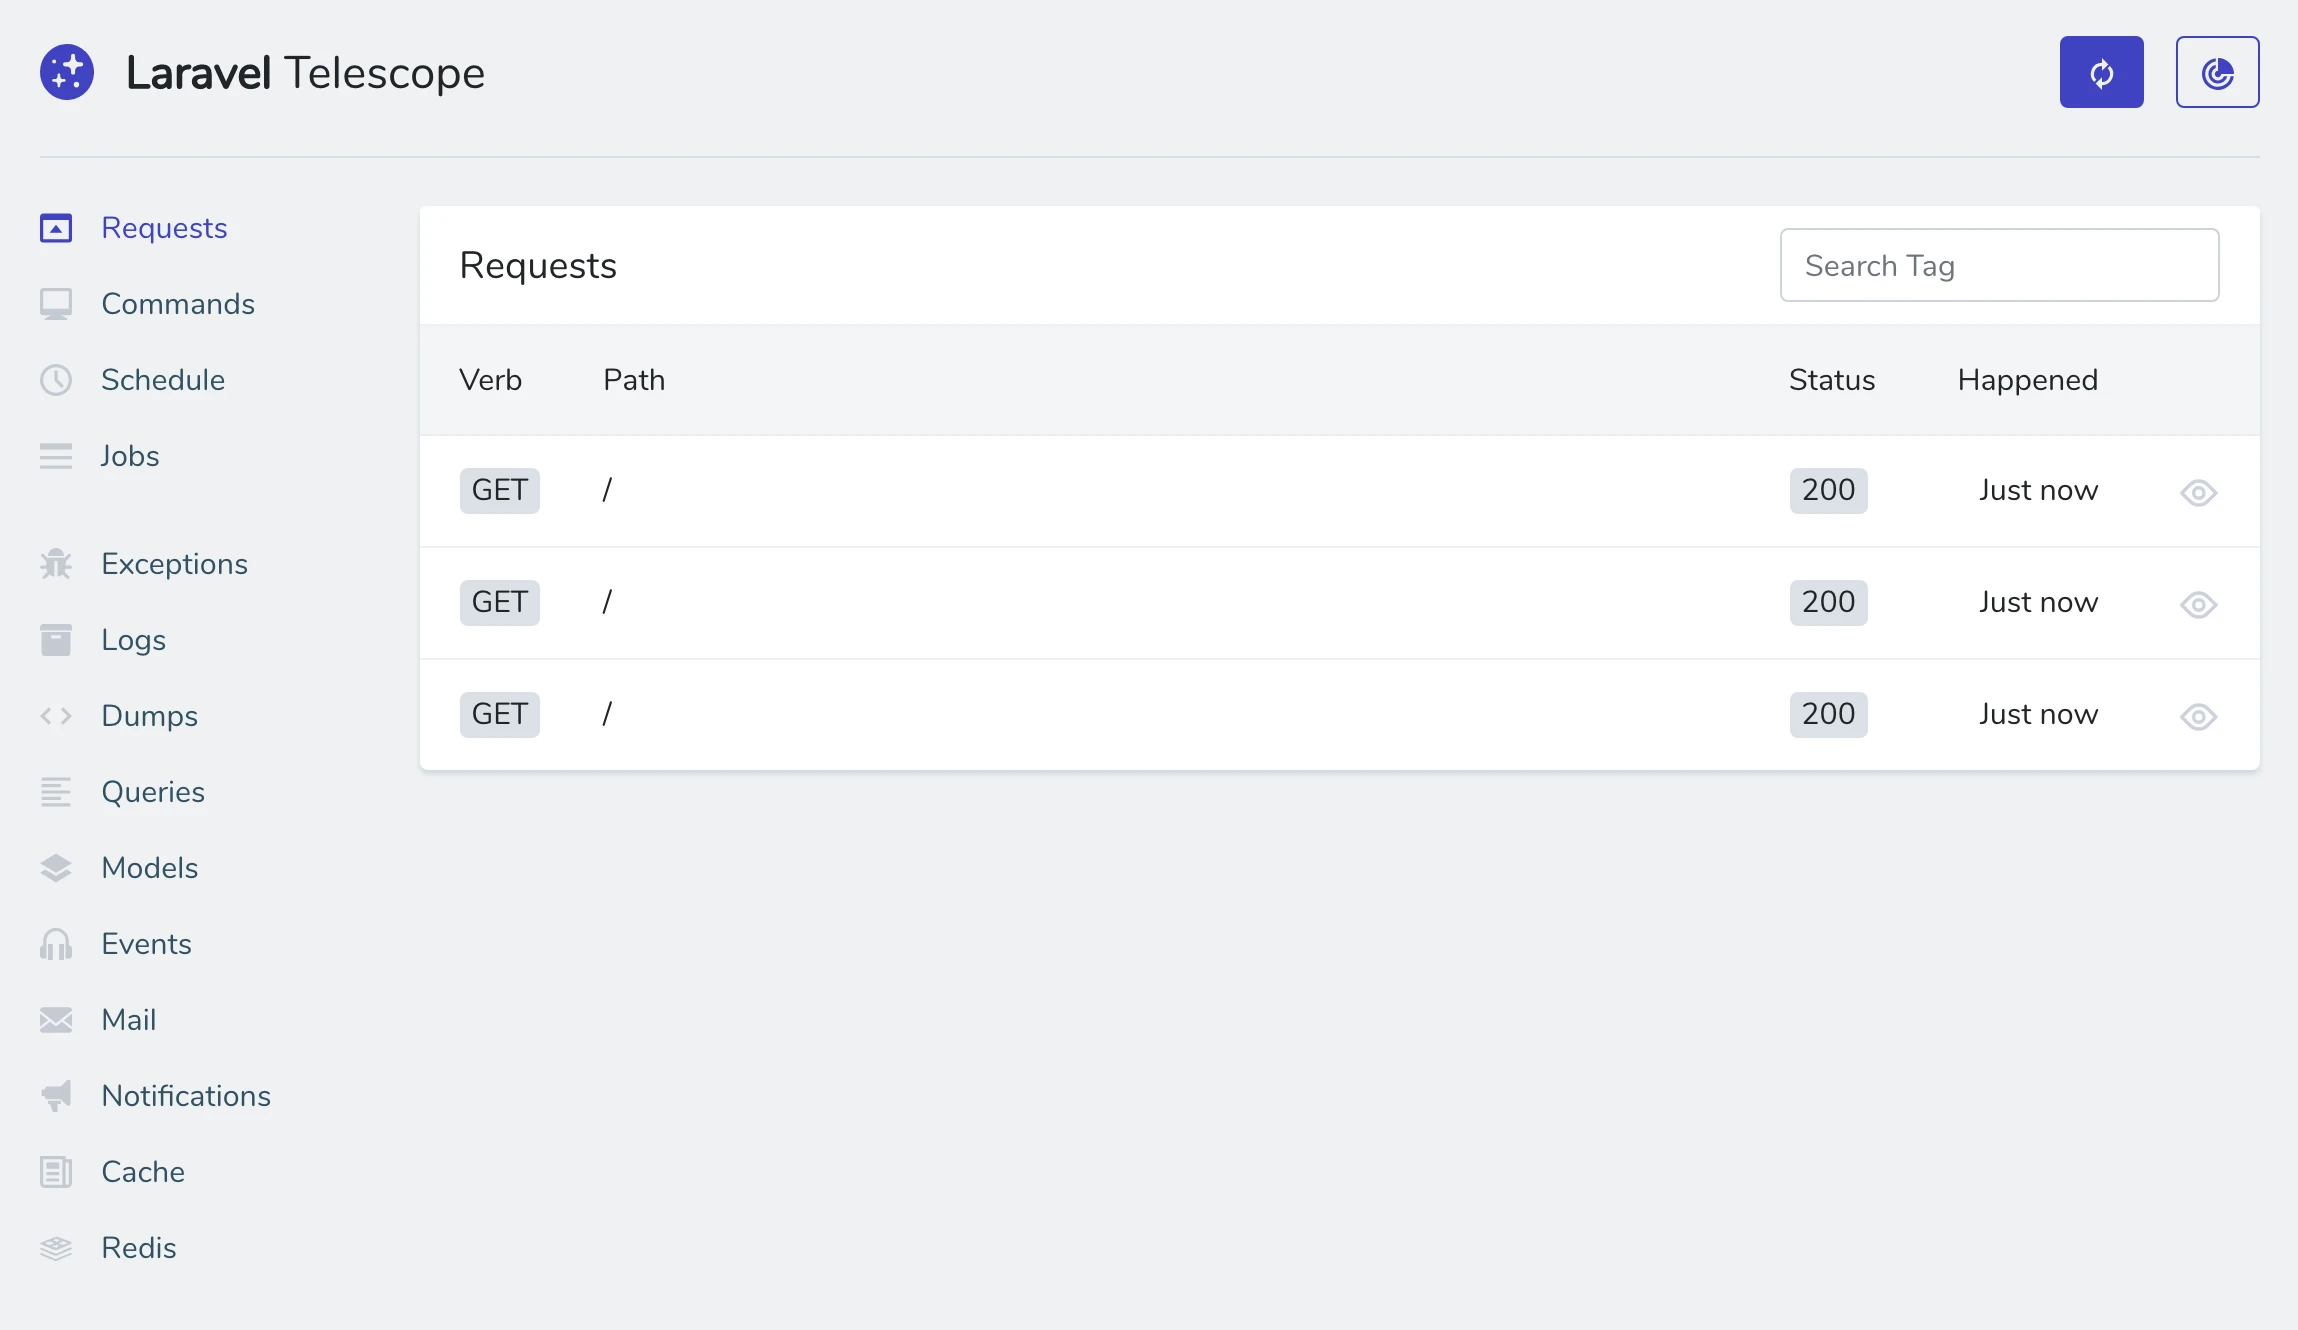
In our previous blog post, we explored the power of Laravel Telescope, a debugging and monitoring tool for your Laravel applications. We learned about its installation and basic configuration, allowing you to gain valuable insights into your application's inner workings.
This blog post dives into Laravel's robust authorization features to restrict access to the Telescope dashboard, ensuring only authorized users can utilize its functionalities.
Understanding Laravel Authorization
Laravel provides a powerful authorization system that allows you to define who can access specific resources within your application. This system utilizes gates, which are closures that determine whether a user is authorized for a given action.
Securing Telescope with Gates
By leveraging gates, we can control access to the Telescope dashboard. Here's how:
- Defining the Gate:
Open your App\Providers\TelescopeServiceProvider class and locate the boot method. Inside this method, use Laravel's Gate::define method to define a new gate named viewTelescope. This gate will determine if a user is authorized to access Telescope.
public function boot()
{
    parent::boot();

    Gate::define('viewTelescope', function (User $user) {
        // Your access control logic goes here
    });
}
- Implementing Access Control Logic:
Within the
viewTelescope gate closure, you can define the criteria for granting access.
These are the main approaches:
- Role-Based Access Control (RBAC):
Allow only administrators (
admin role) to access Telescope:
Gate::define('viewTelescope', function (User $user) {
    return $user->hasRole('admin');
});
Allow both administrators (admin) and developers (developer) roles to access Telescope:
Gate::define('viewTelescope', function (User $user) {
    return $user->hasRole('admin') || $user->hasRole('developer');
});
- Permission-Based Access Control (PBAC):
Create a specific permission called view_telescope.
// Define permission in your migration or seeder
Permission::create(['name' => 'view_telescope']);

// Assign permission to users
$user->givePermissionTo('view_telescope');
Assign this permission only to users who should access Telescope.
Gate::define('viewTelescope', function (User $user) {
    return $user->hasPermission('view_telescope');
});
- Combining Roles and Permissions:
You can combine role and permission checks for more granular control:
Gate::define('viewTelescope', function (User $user) {
    return ($user->hasRole('admin') || $user->hasPermission('view_telescope')) && app()->environment('staging');
});
This example allows access to Telescope only on the staging environment for users with either the admin role or the view_telescope permission.
- Restricting Access Based on User Data:
For more advanced scenarios, you might want to restrict access based on additional user data.
Here's a conceptual example (implement logic based on your requirements):
Gate::define('viewTelescope', function (User $user) {
    if ($user->hasRole('admin')) {
        return true;
    }

    if ($user->hasPermission('view_telescope')) {
        // Check additional user data (e.g., department)
        return $user->department === 'engineering';
    }

    return false;
});
By implementing authorization gates, you can ensure that only authorized users can access the Telescope dashboard in production environments. This safeguards your application's sensitive data while allowing authorized users to leverage Telescope's valuable debugging functionalities.
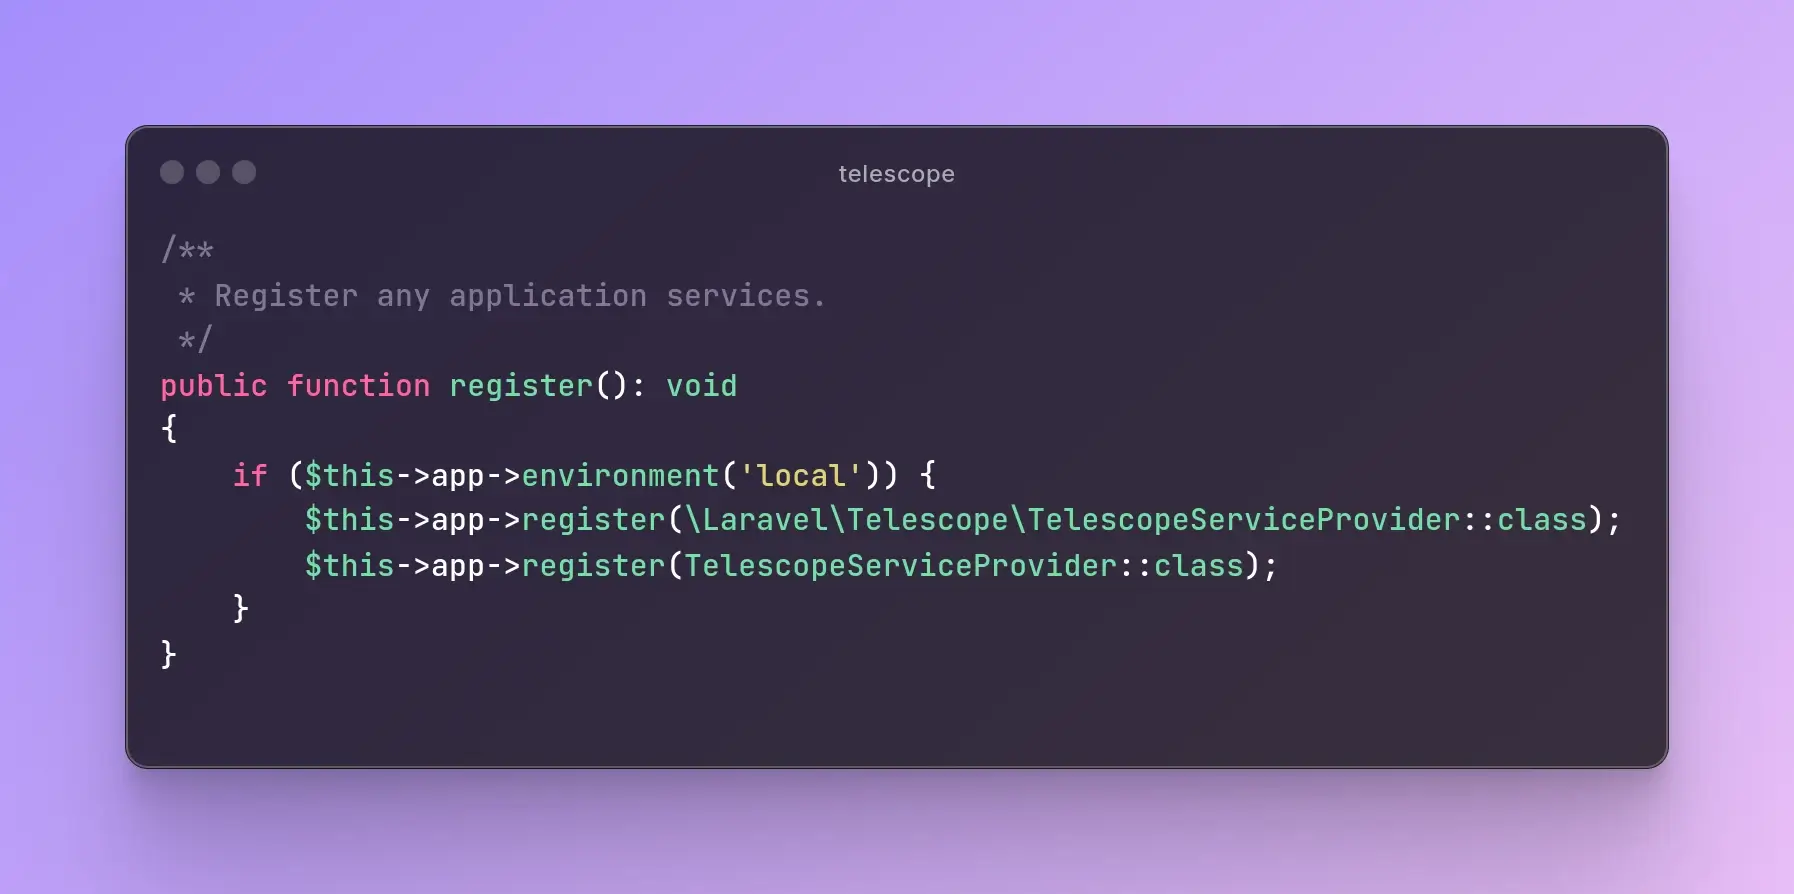
Simplifying Telescope Registration in Laravel 11
After running the telescope:install command, you'll need to make a small adjustment to how Telescope registers itself within your Laravel application. This ensures Telescope is only accessible during local development for security reasons.
Here's a breakdown of the steps:
- Remove Unnecessary Registration:
- Open the
bootstrap/providers.php file.
- Locate the line that registers
TelescopeServiceProvider. Remove this line.
<?PHP

return [
    App\Providers\AppServiceProvider::class,
    \Laravel\Telescope\TelescopeServiceProvider::class // Remove or Comment this line
];
- Register Telescope Only in Local Development:
- Open the
App\Providers\AppServiceProvider.php file.
- Find the
register method.
- Inside
register, add the following code:
/**
 * Register any application services.
 */
public function register(): void
{
    if ($this->app->environment('local')) {
        $this->app->register(TelescopeServiceProvider::class);
    }
}
Fine-Tuning Telescope (Optional):
- After setting up Telescope, a configuration file (
config/telescope.php) appears.
- This file lets you adjust how Telescope collects data (called "watching").
- Descriptions within the file explain each option.
- If you don't want Telescope to collect data at all, simply set the
enabled option to false.
'enabled' => env('TELESCOPE_ENABLED', true),
- Telescope stores data, but it can grow large. To keep it tidy, run the
telescope:prune command daily (e.g., using a scheduler). This cleans up old entries.
use Illuminate\Support\Facades\Schedule;

Schedule::command('telescope:prune')->daily();
By default, all entries older than 24 hours will be pruned. You may use the hours option when calling the command to determine how long to retain Telescope data.
use Illuminate\Support\Facades\Schedule;

Schedule::command('telescope:prune --hours=48')->daily(); // Older than 48 hours
- At Last, you should also prevent the Telescope package from being auto-discovered by adding the following to your
composer.json file:
"extra": {
    "laravel": {
        "dont-discover": [
            "laravel/telescope"
        ]
    }
},
Conclusion
Laravel Telescope is an invaluable asset for Laravel developers. Its comprehensive debugging features and insightful monitoring capabilities streamline development and troubleshooting. Remember to prioritize security by keeping Telescope out of production environments and implementing proper authorization measures. With Telescope by your side, you can build robust and efficient Laravel applications.
Part 1
Happy Coding!